HOW TO MEASURE YOUR WARDROBE
HOW TO MEASURE YOUR WARDROBE
Are you looking to elevate your bedroom storage to stylish new heights? Here’s your guide to getting started. Below are some considerations and steps that will guide you through the process of taking your wardrobe measurements. We strongly suggest drawing this space on the grid paper provided below. This will help us visualise your space and help you achieve your wardrobe with wow factor.
Once this is done, visit one of our showrooms with the measurements or book an appointment.
STEP 1.
Take a photo of the area where you want the wardrobe.
STEP 2.
Measure height from floor to ceiling and floor to cornice. Also you can measure floor to bulkhead if applicable.
TIP: MEASURE HEIGHT FOR BOTH THE LEFT HAND SIDE AND THE RIGHT HAND SIDE AS THEY MAY VARY.

MEASURE HEIGHT – FLOOR TO CEILING AND FLOOR TO CORNICE

MEASURE HEIGHT – FLOOR TO BULKHEAD
STEP 3.
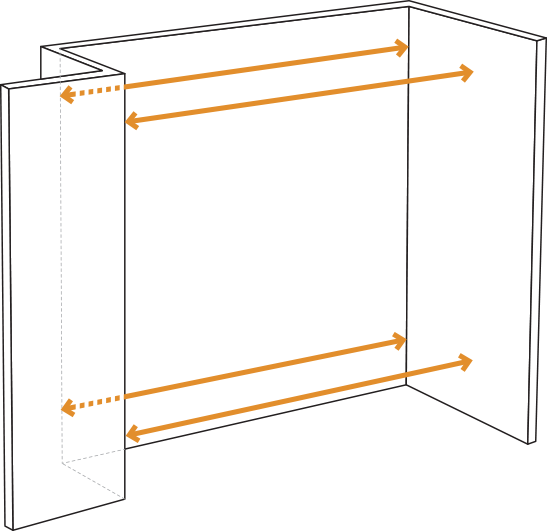
Measure the width. Tip: Start on 1 side and measure up to 1000mm (1m), mark with a pen. From the opposite side measure distance to the 1000mm mark you made. Add the 2 measurements together. This will give you an accurate overall width.


STEP 4.
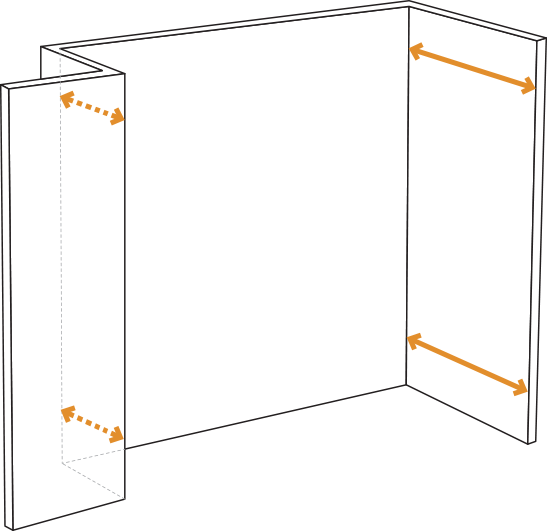
Measure the depth from front to back on both ends of the wardrobe.


STEP 5.
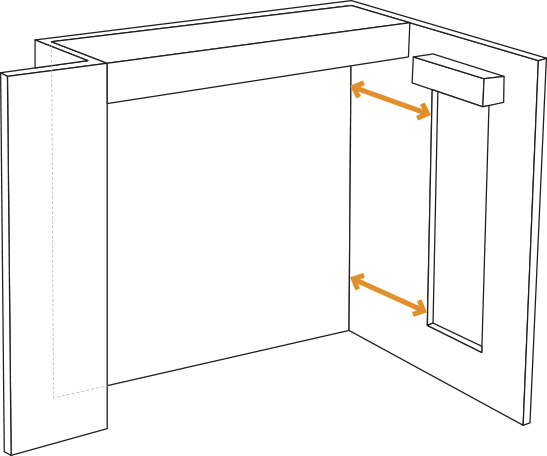
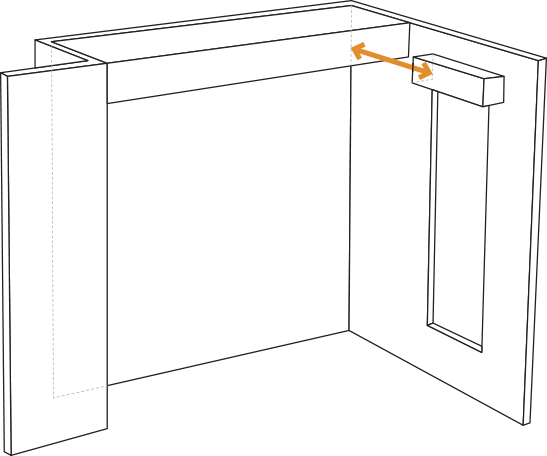
Measure the distance from the back of the wardrobe to the start of the window architrave. Note depth off the wall of all curtain pelmets, plantation shutters, blinds etc.


STEP 6.
Measure the distance from the back of the wardrobe to the start of any manholes.

